In this article, we’ll cover the most important steps of setting up your stamp collection:
- Cleaning, sorting, and soaking
- Laying out your stamps
- Types of albums and stockbooks for storing your collection
- Hinges and mounts for securing your stamps
- Annotations
Contents
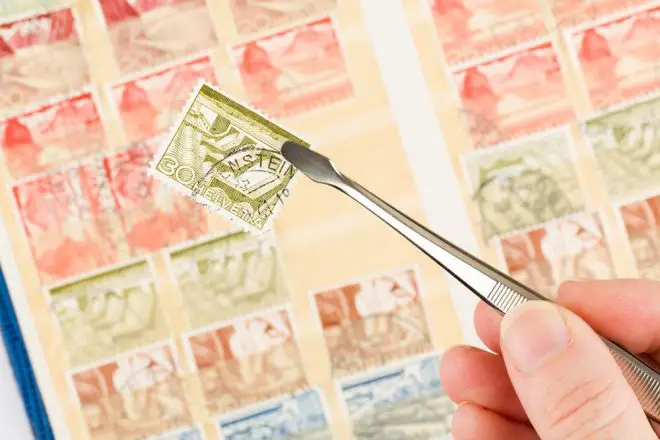
Laying Out the Stamps
Before you do anything, it’s always wise to sort your stamps into clean and unclean piles. Clean stamps have already been removed from envelopes and have gone through the soaking phase (which are ready to be arranged). If you have any stamps in your pile that have not been cleaned or removed yet, go ahead and take a look at How to Remove Stamps From Envelopes to see a common soaking technique. After your stamps have been soaked and dried, they will be ready for arrangement!
Go ahead and sort the stamps if you have any in your pile you do not intend to use for an album (such as duplicates, for example). You can sort by year, color, country, topic, or any criteria desired! If you already have a way of organizing stamps in your album, feel free to proceed with your preference.
A common mistake is trying to cram too many stamps onto a single page. Spread out the stamps and move them around until they appear balanced. How you arrange your stamps is entirely up to you, but most collectors suggest not placing the same amount in each row. Mix it up a bit!
You may also want to sort your stamps into different categories or groups that go into separate albums. After you have them separated (using your method of choice), you can arrange them by rows, form a pyramid/shape, or even arrange them one by one alongside annotations.
You may want to include more than just stamps, including original artwork, postmarks and cancels, postcards, etc. Again, how you present your stamps is entirely up to you, but why not get creative with it? You can even use an online program such as Stamp Album Studio. http://www.stampalbumstudio.nl/
What Should I Use to Store the Collection?
If your stamp collection is continuously growing, a loose-leaf album may be the best option. While this method of storage is always a solid all-around choice, loose-leaf is particularly suitable for beginner collectors as they hone their craft. Because you can adjust page by page (move a page to another section or altogether remove a page from the album), there’s plenty of flexibility in terms of reorganization.
A classic 3-ring binder works well for loose-leaf style albums. However, do be wary of cheap binders from office supply stores. If you can find a higher quality binder or album (online or through a stamp dealer), it’s almost always worthwhile in the long run. If you need plastic sleeves but don’t have them, you can purchase plastic sheet protectors at a reasonable price. These protect your stamps and work well with the loose-leaf albums. Remember to store your binder upward and not laying on its side, so that you don’t damage any stamps. For other care/storage tips, check out our article on How to Care for a Stamp Collection.
A stockbook may be the option for you if your stamps are of higher quality and rarity, and you need a high-quality system for archiving. They are usually made from cardstock with clear strips to hold your stamps and other collectibles. Each page is separated by a clear page so that no two pages stick together (which offers additional protection for your stamps). Stockbooks are an excellent investment if you collect higher value or mint quality stamps, and they are especially worth it if you wish to make sure your collection stays as pristine as possible.
If you don’t want to make the album yourself, another option is to purchase pre-printed albums, such as the ones that have separate pages for stamps of every country.
When Should I use Hinges or Mounts?
Once you’ve chosen an album to use, you will be ready to hinge or mount your stamps!
Stamp hinges were traditionally made from a gummed transparent paper to mount stamps on a page. Although they are supposed to be removable, they can sometimes leave remnants.
Although hinges are not as commonly used today, they do work well for lower value or used stamps. You should never use a hinge on a higher value stamp, or it could lower the value if you ever decide to sell the stamp later on.
A mount can protect your stamp from dirt or damage and are the go-to way of applying stamps in an album. For a higher level of protection, go with a modern black stamp mount. These mounts are composed of a transparent plastic sleeve with a black plastic backing. You can also buy mounts with clear backings. Some collectors prefer to use mounts for every stamp they own because of their level of protection. If you wish to go a more inexpensive route, only use mounts on stamps that are valued at five dollars or more, or stamps you may intend to sell in the future.
If you don’t want to use hinges or mounts (and you have many cheap, used, or duplicate stamps), you can also use double-sided tape to attach the stamp to paper. You may also do this if you want to secure a stamp to a surface, such as doing a monochromatic stamp letter project or some other DIY stamp craft. If you’re just looking to display the stamp creatively, double-sided tape works just fine.
Annotating the stamp
Annotating is a process some stamp collectors like to perform to add to their collection. If you plan on annotating, pre-plan for the way you will add notes to the stamp, and where (space-wise). You want to leave enough room for all the information you wish to include. Put the text on a scrap sheet of paper and place it where you think it looks best, and try to keep it balanced. Beneficial/helpful information may include the following:
- date of issue
- title of the stamp
- name of designer
- name of printer
- printing process used
- perforation details
- watermark info
Do not use a pencil, for the marks will not stay dark enough to read in years to come. And do not use a ballpoint pen, for the ink may eventually smudge and ruin the page. A fountain pen would work just fine. You may also type up and print annotations if you wish to create a more professional look.
Sometimes there will be a bit of research required with particular stamps if you do not have enough annotation info. Don’t be afraid to dive into the story behind a stamp, because that’s half the fun in collecting! Learning about the history of a stamp can be fascinating and result in an even deeper appreciation of your collection.


")
